DIY Fashion: Little Black Dress Makeover Edition

I have a habit of collecting awful dresses with the intent of revamping them into actual wearable clothing. I'm not sure what it is but I always see things for what they could be instead of what they actually are. What can I say? I like a challenge.

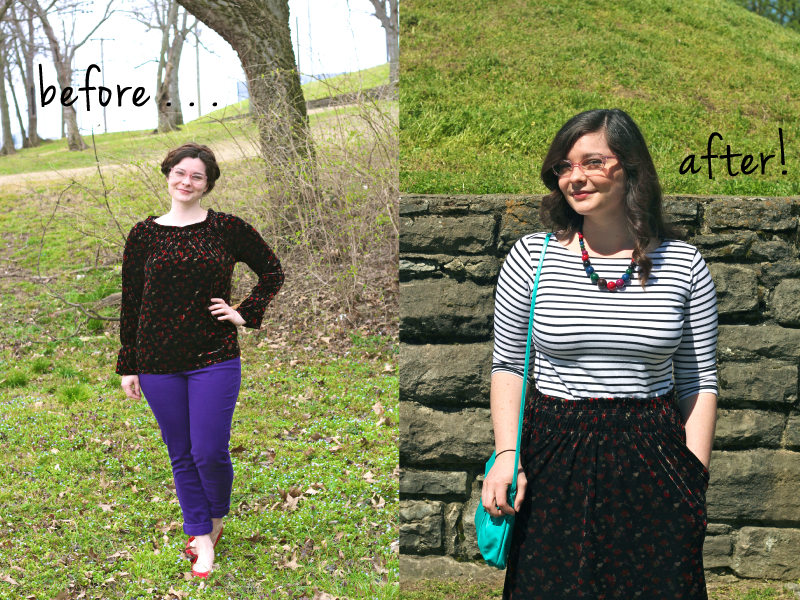
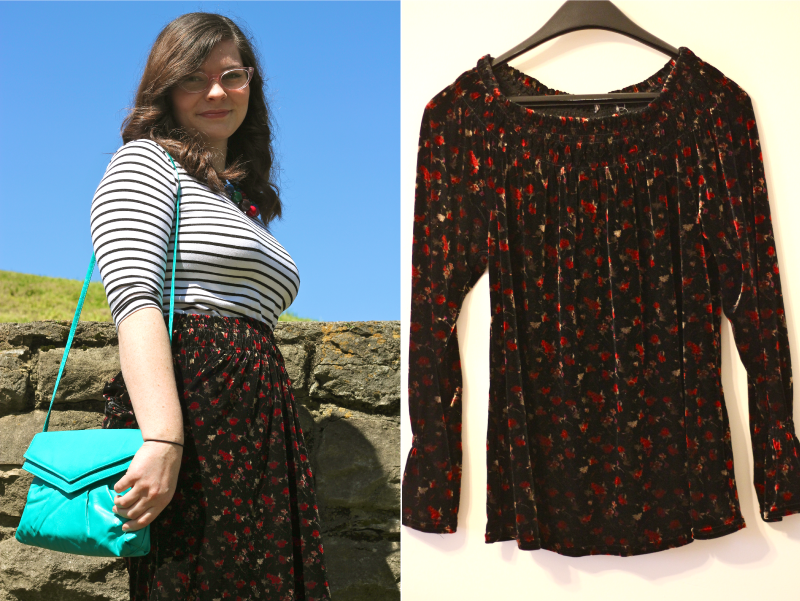
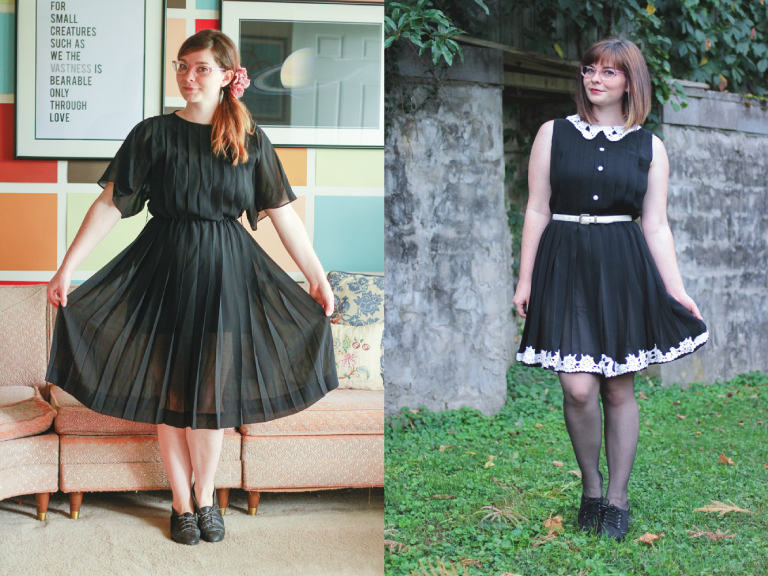
I think that's what happened here. I found a crazy black dress for $7 at a thrift store and had to have it. I think I fell in love with the pleats. Although it resembled more of a graduation gown than anything, I apparently saw great potential and snatched it up.

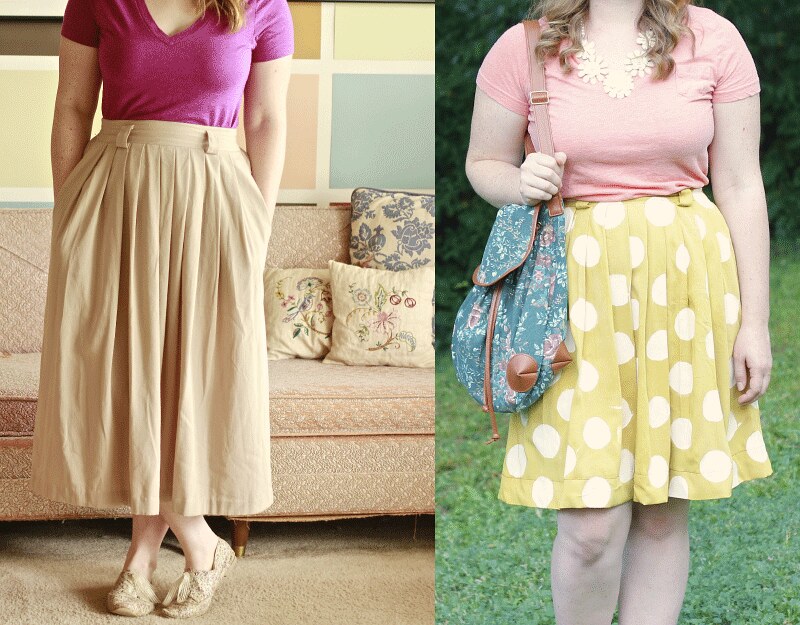
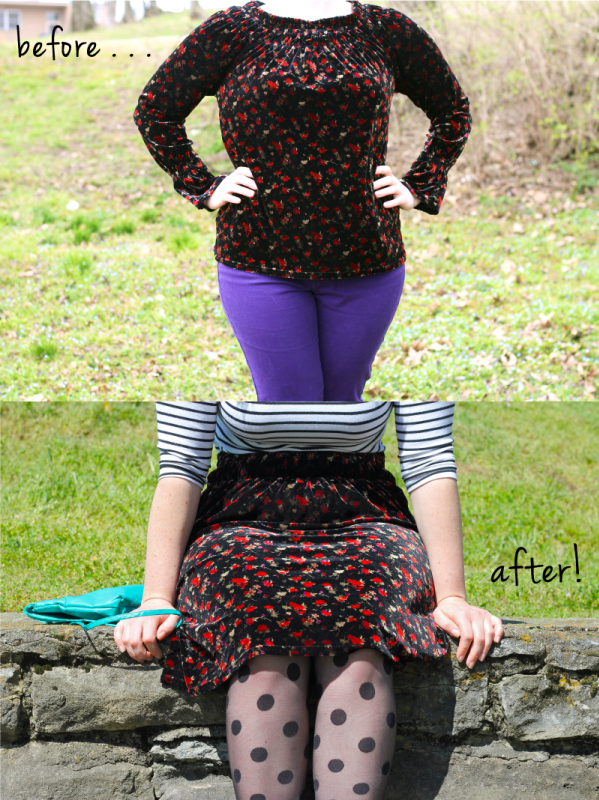
Though the before and after is pretty exciting (and possibly made more drastic due to my haircut in between!), it was a pretty simple process. Bonus points because I actually remembered to photograph the dress refashion— check out each step below. 

1. Remove sleeves

This part was really easy. It's also pretty fun to see how much more modern the dress looks simply by cutting off the terrible bat sleeves. I mean, still not fit for a runway— but it's a definite improvement. 

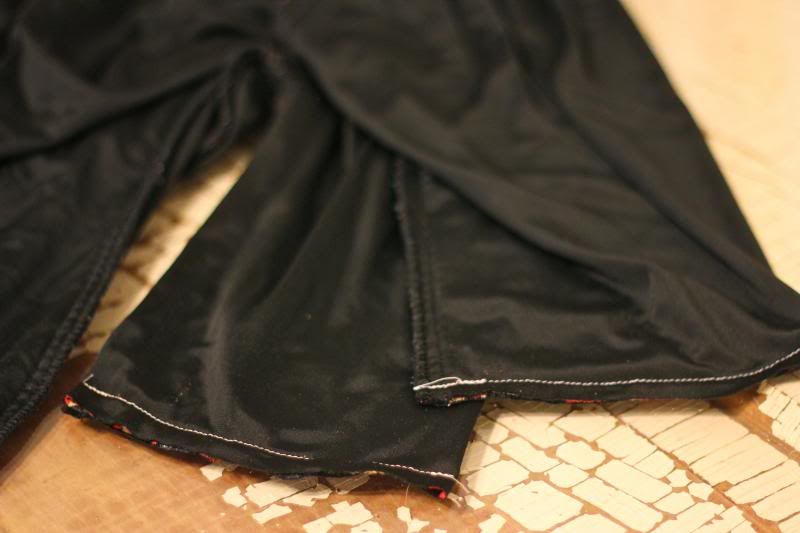
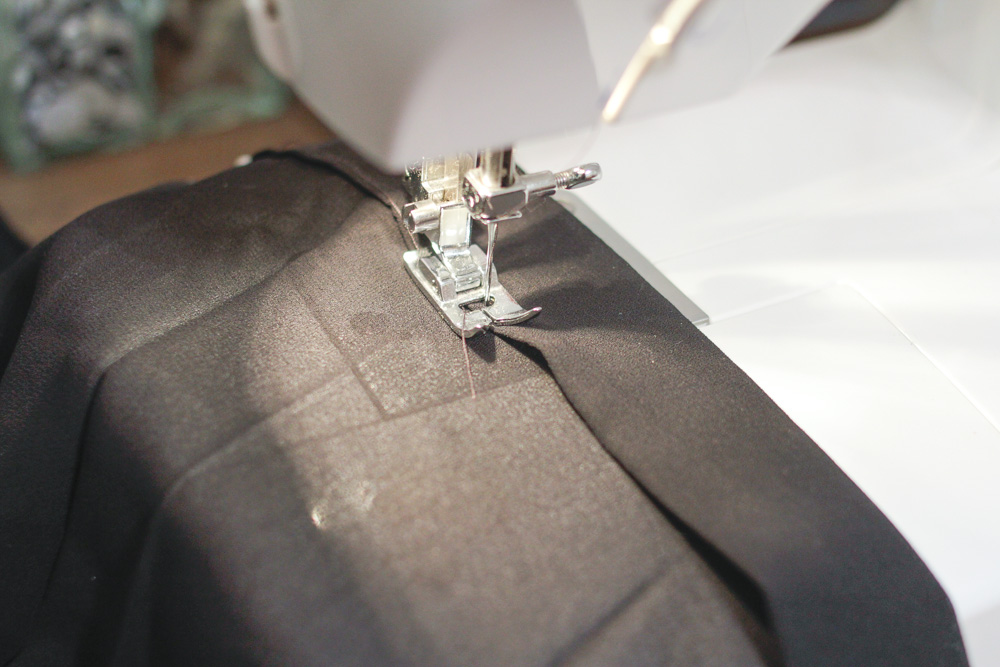
2. Hem the dress to a modern length

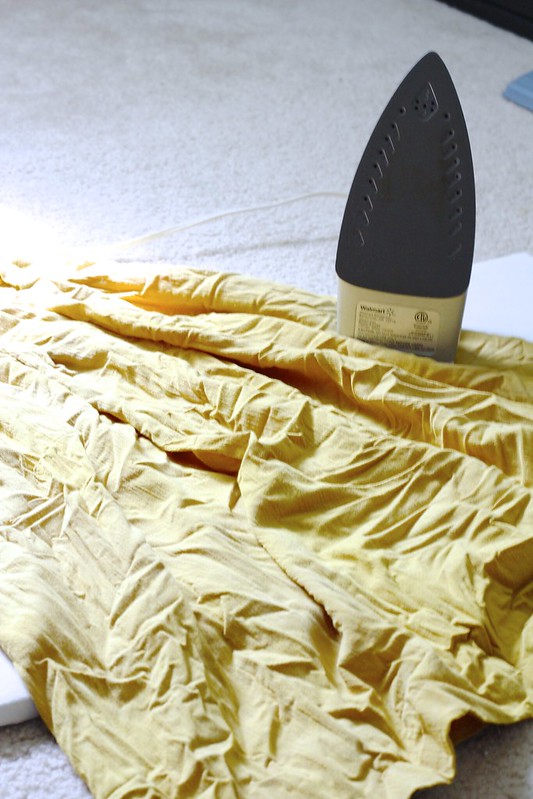
I think hemming a dress or a skirt is the easiest way to update it. I still don't have a ton of experience on a sewing machine, but hemming is super easy— basically just a straight line. I just cut a few inches off, folded it over, pressed it with an iron, pinned it in place, and then stitch, stitch, stitch.

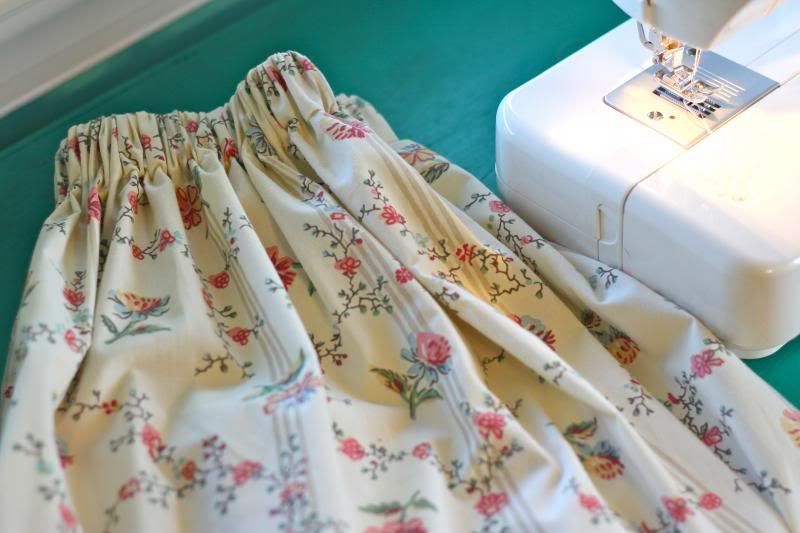
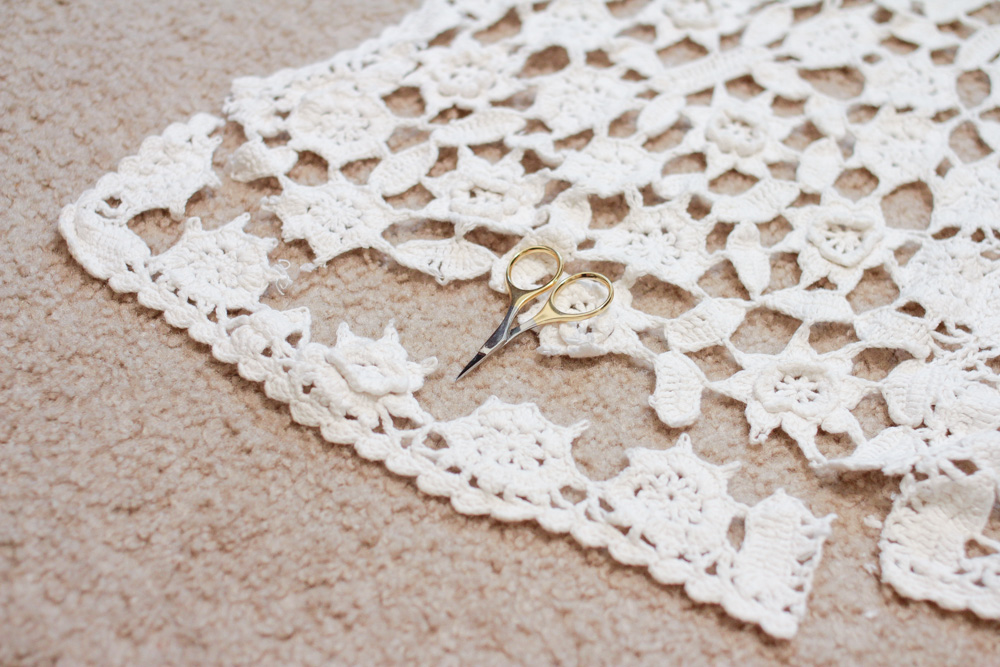
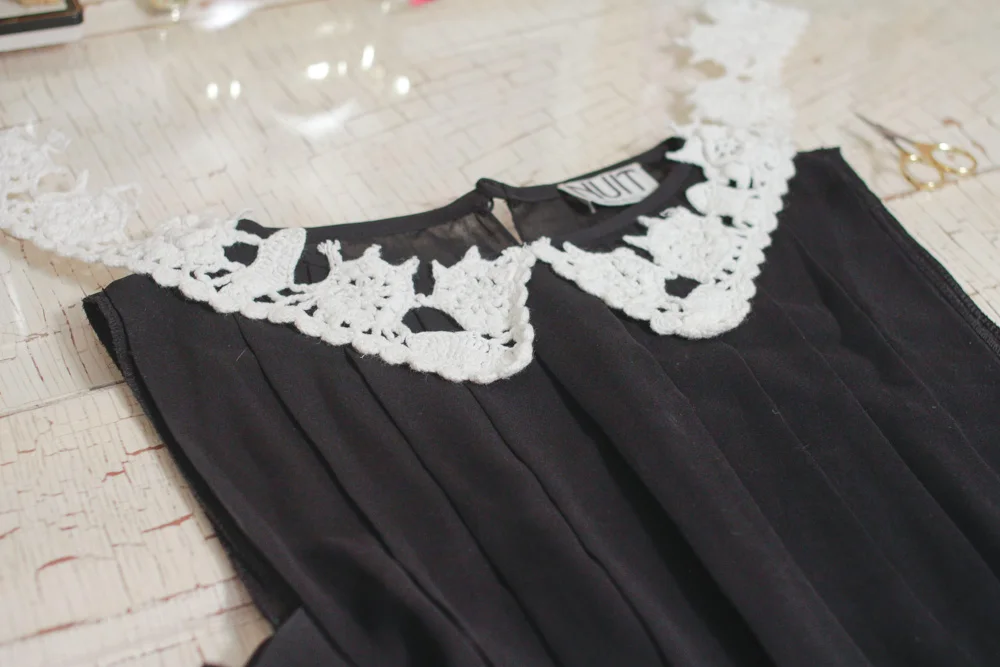
3. Add crochet details + buttons 

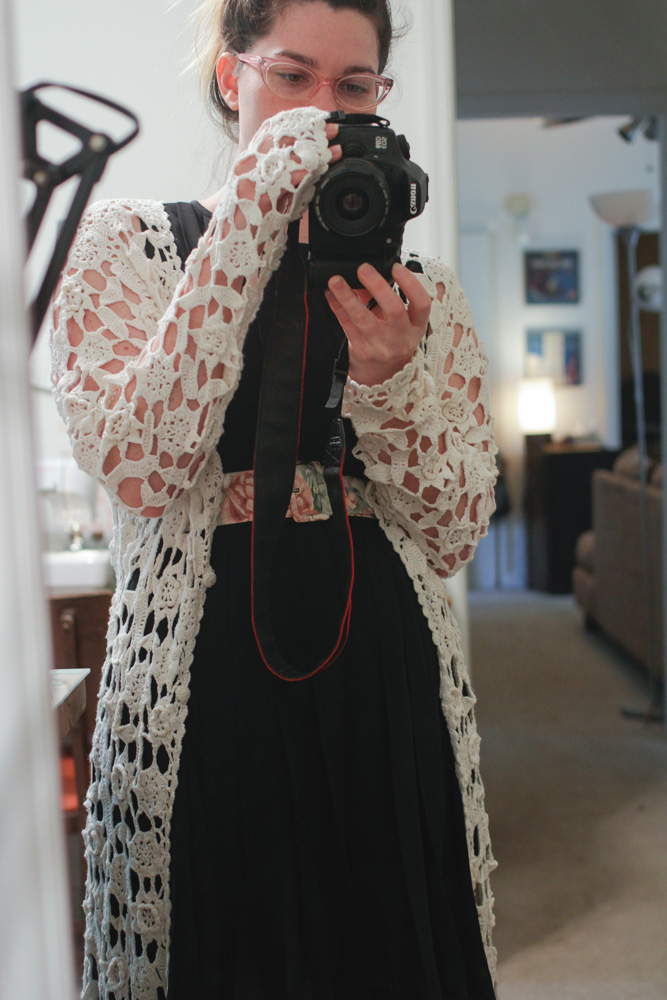
I probably would've stopped at this point if I didn't have the crocheted sweater pictured below. My mom is an avid thrifter (where did you think I got the habit?) and picks up neat things for me sometimes. I'm pretty fond of lacy clothes but the sweater didn't fit very well so it was in my fabric reuse stash. 

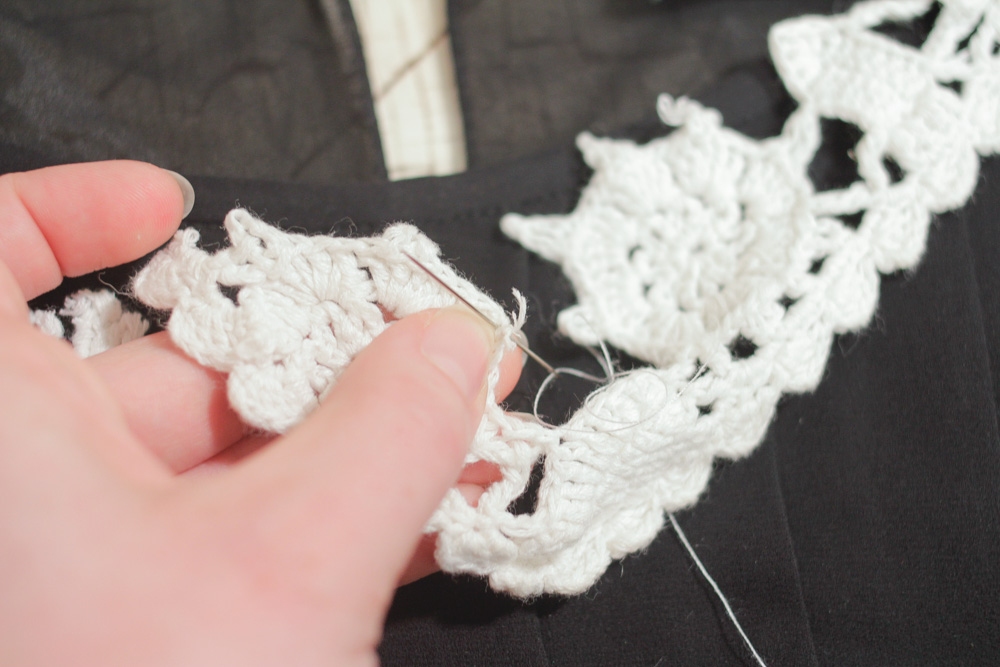
I somehow had the grand idea to use the sweater as trim for the dress. Though it was a huge pain to hand stitch the details on (it wasn't difficult, just time consuming!), I dare say it turned out better than I imagined! I used the corner pieces for the collar and then just pieced the rest together along the hemline. 
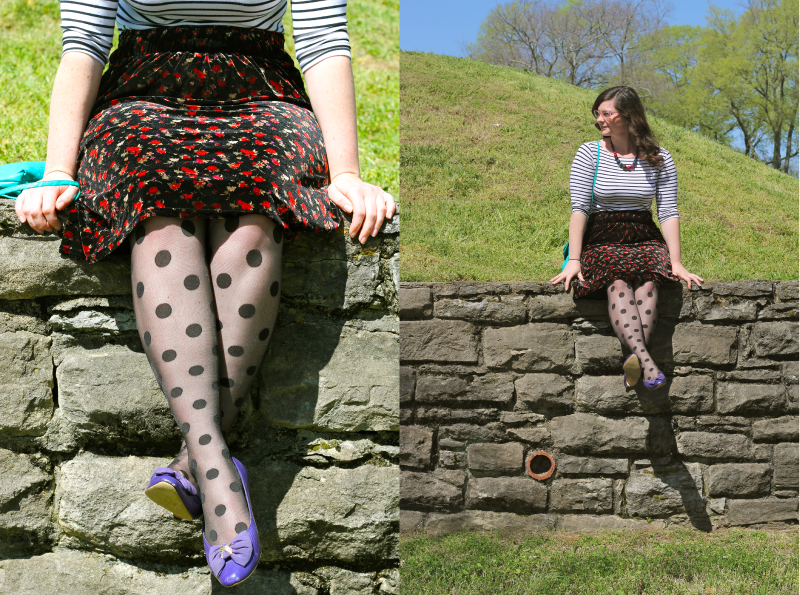
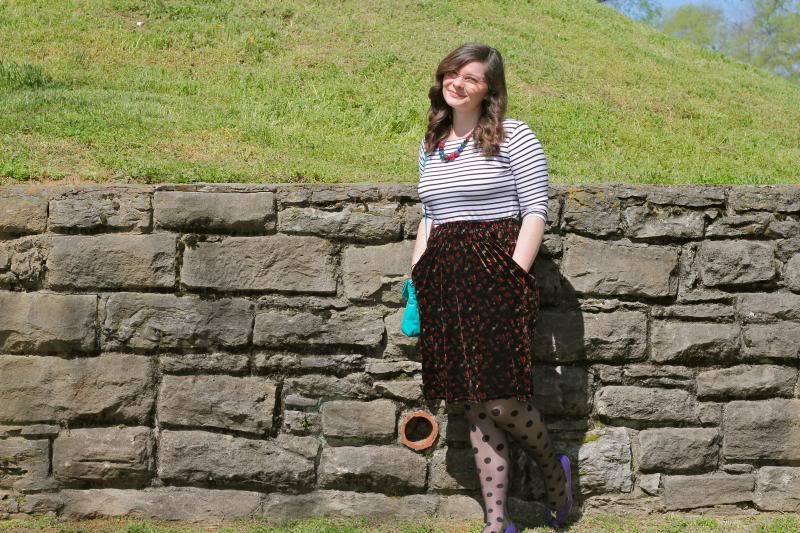
4. Enjoy $7 dress 

And that's it! Now if you can ignore the "50 shades of Jenna's hair" look (I swear it's fixed now, please don't judge me!) then I think it's pretty obvious that this is now my go-to little black dress.

Note: you can tell it's very sheer in the before photos, but with the *appropriate* slip it's perfectly fine. 

My favorite part of this dress might just be the fit. I generally go for "fit and flare" style dresses that are tighter on top, however, I really love how casual this dress feels even though it looks a bit dressy. 

So that's the story of my $7 dress transformation! I think my next sewing project might be a skirt with a zipper— though I am extremely intimidated by the thought of that. Or maybe a simple shirt. . . Uh dear, I think I have the sewing bug. . .  Have you sewn or refashioned anything lately? There is something so satisfying to me about turning nothing into something special.  

Skirt Makeover with Natural Dye & Fabric Paint

turmeric dye

I found this long plain cream skirt at a thrift store a few months ago for a few bucks and snatched it up. Since I finally learned to use a sewing machine, I thought I would just hem it up and then have a nice basic khaki skirt that I could wear a million ways.

Natural Dye

But then I realized that was boooooring! And also when the heck do I ever wear khaki? So I started thinking about how I could refashion my new boring thrift find. I came across this skirt and fell in love with the beautiful golden mustard color + I'm a sucker for polka dots and I just knew I had to have my own.

Natural Dye turmeric

I figured I could get a nice golden color using a natural, homemade dye instead of buying any. I thought turmeric would make a nice dye so I poked around on the internet, found this article for reference, and then dove right in.

Natural Dye skirt
diy polka dot skirt

I ended up boiling my skirt in 12 cups water + 3/4 c. salt for one hour. After it cooled, I made a fresh pot with 14 cups water + 1/2 cup turmeric + a splash of vinegar. I brought it to a boil, simmered for 15 minutes, added my still wet skirt, and simmered for 45 minutes— stirring occasionally to get an even dye job. When it was done, I removed it from heat and let it cool before rinsing it out.

diy polka dot skirt

Next, I machine washed it to make sure all the turmeric was rinsed out. Then I ironed it, hemmed it up, and added some oversized polka dots with big round sponge + some fabric paint. I had to go back and fill in the dots with a paint brush to get the coverage I wanted, but I kind of figured that would happen.

diy polka dot skirt

I'm pretty pleased with how this turned out! The fabric paint dried a little stiffer than I thought it would but I also haven't washed the skirt since I added the polka dots so I'm not sure if that will make a difference . . . (And now y'all know that I'm one of those nasty people that wears things one million times before washing it. . . sorry not sorry— I don't have time for that!)

diy polka dot skirt

Anyway, I ended up learning a lot from this project and now I have a cute new skirt! This is actually what I wore to a Nashville blogger meetup we had awhile back— Nick was kind enough to snap a few photos of me before I headed out for fun.

Natural Dye skirt

Have you ever used plant based dyes for anything? I'm really curious to try more in the future— I feel like beets would make a gorgeous color?! I recently went through my closet and now I have a little pile of projects to work on so hopefully I will get my butt in gear and have more refashions to show you soon!

skirt refashion

I hope you all have a great weekend! -j. 

I MADE THIS: Skirt from a Vintage Sheet

Hello, hello— I just wanted to share a little sewing update with everyone! I mentioned here that I wanted to make a skirt from scratch now that I know how to use a sewing machine. So in case you don't read blog post titles, HERE IS THE SKIRT I MADE!

I got together with some of my favorite local bloggers a few weekends ago and we had a little sewing circle. I made this skirt using this video tutorial and some guidance from Miss Ladybird. I'm really glad I used a vintage sheet as the fabric— it's super unique and also a really cheap source of lots of fabric.

I also didn't want to ruin any "nice" fabric since I don't really know what I'm doing yet. I learned a lot from this project and I can't wait to make something a bit more fitted next time. I'm not too crazy about the cut of this skirt (it's A LOT of bulk in some places) AND I ended up making it a little shorter than I normally like. But I think it's a great beginner project— I definitely feel confident enough to take on some more complicated pieces now!

Also, I just want to say that hanging out with bloggers IRL is even cooler than you think it's going to be— I'm so thrilled to live near such talented and welcoming ladies! Lauren also recently learned to sew and she is making a badass dress right now. I was pretty impressed with the knitting project that Jen brought along— I have no skill in that arena so it was awesome to see in action. Janae worked on some sketches for a future sewing project and Aubrey came along to see what everyone else was up to + get inspired. And I believe Sarah was on her way out when I got there but judging from her blog she made something amazing, too!

Seriously though, I've wanted to sew since I was like 10 and I'm so glad I finally dove in! I'm excited to learn everything I can— AND to have such an awesome support group! I'm glad so many people came along to the meetup on such short notice— I can't wait for the next time! I think I'm going to try some aprons or a dress next— who knows?!

Also, here is a bonus picture of Lladybird's cat— she is a grump. And here is another picture of the shoes that I'm in love with. Lastly, does anyone have any tips on beginner sewing blogs or projects? I'm all ears!

dress worn as a top: thrifted (originally AA) / skirt: made by me / blazer, tights: target / shoes: thrifted

I Made This: Skirt from A (Really Terrible) Shirt

how to make shirt into skirt
upcycle shirt to skirt
diy shirt to skirt

I'm not even going to try to explain why I had this shirt in my closet— I don't wear velvet, it's not flattering, it's not comfortable, I hate long sleeves, it has an elastic neckline?! . . . there's really no excuse for it. I know it's from a thrift store but I don't know how it made it home with me. So let's just skip over those sad, sad before photos and move on to the part where I transformed this ugly situation into something actually wearable!

I was purging my closet recently when I rediscovered this shirt. Given it's pitfalls, I decided it was very cruel to allow anyone else the opportunity to own it. So rather than donate it, I decided to see if I could do something—anything with it.

This was the first project I attempted with a sewing machine on my own without any help. It was literally the easiest thing ever— just two straight lines. I snipped off the weird bell sleeves, turned them inside out, and sewed them shut. So the neck of this shirt become the waist and the sleeves became the pockets. Seriously though, what's better than a skirt with comfy pockets?!

I'm still not really a velvet person but this skirt is perfect for springtime in Tennessee! Lately it's been really brisk in the morning and evenings but warm and sunny during the day. So this skirt just happens to be the perfect material to wear throughout the whole day without feeling like you jumped the gun on summer or that you're dressed too heavy for April. I can also see myself wearing it next winter with some bright red shoes around the holidays ;-)

So there ya have it! One less thing on my "to-sew" list. Next I hope to make a skirt completely from scratch and to keep on fixing items in my "to-mend" pile. Anyone else out there have a growing pile of clothes you plan on fixing or making into other things? I can't be the only one. . .

 glasses: Coastal / tights: Tabbisocks / everything else: thrifted + estate sales

Ps. How do y'all like that pattern mixing?! Stripes + floral + polka dots?! Yes, please!